Introduction
So far, we have worked on those applications which are small and need only a single container. But in real world, a large and complex application does not run on a single container. Also, with the advent of Microservices, each component of a web based application typically runs on separate containers.
In this post, we will create multiple containers of an application and will run each container in Docker Swarm.
When you want to work with multiple Docker containers, there are two options :
1) Docker Compose
2) Docker Stack
Lets discuss these two options one by one.
Docker Compose
As Docker documentation says; “Compose is a tool for defining and running multi-container Docker applications.”
The Docker Compose tool is developed in Python, and it works on the top of the Docker engine. It works on the docker-compose.yaml file.
It is easy to get confused between Dockerfile and Docker Compose. Dockerfile is a text file, which defines environment, commands, ports and other parameters for a single container.
However, if you have an application based on multiple containers, and you want a single tool which will build the app and run all the containers in an isolated environment, you need Docker Compose.
You can also use Docker Compose on a single container. It offers some powerful features to configure the
If we use build keyword within docker-compse.yaml file, it means we are going to specify the path of a dockerfile. Docker compose will then create an image from that dockerfile, and then from that image it will create a container.
If we use image keyword within docker-compse.yaml file, it means we are going to specify an existing image name. Docker will launch a container from that image.
With Docker Compose, there are three major steps involved to create a container :
- Create a Dockerfile. This will define the application environment.
- Create a docker-compose.yml file. This fine will define all services that is required to run the application in an isolated environment.
- Execute docket-compose -up , to build the container and run it. This command needs to be executed from the project folder, where docker-compose.yml file and other files are stored.
To run your services in the background, you can pass -d flag :
- docket-compose -up -d
To see what is currently running, use docker-compose ps
For more information on Docker Compose, please refer this link.
Docker Stack
Docker stack is another way to deploy a multi container application. Docker Stack is part of the Docker Engine, and it is not an additional component.
Similar to Docker Compose, Docker Stack also uses docker-compose.yml file to deploy the application.
However, unlike Docker Compose, Docker Stack does not build an app using Dockerfile. Docker Stack ignores any build instruction, and does not build any docker image. It needs an existing image, which it deploys with the input from docker-compose file.
So if you need to build custom image from docker-compose file, Docker Stack is not the solution and we must use Docker Compose tool. However, both Docker Compose and Docker Stack has the ability to deploy a multi-container application and to bring up Services , Volumes and Networking components.
Also, to run Docker Stack, we need to run Docker Engine in Swarm Mode. We will discuss Docker Swarm in detail in our next article, but for now we just need to understand that Docker Stack cannot run without the Docker Swarm Mode.
Command to deploy Docker Stack is :
docker stack deploy -c docker-compose.yml < stack name>
Again, you should run his command from the project folder, where you have stored the docker-compose.yml file.
For more information on Docker Stack, please visit this link.
Deploy a multi-container application using Docker Stack
In the following exercise, we will perform following activities :
- Upload the Pythonapp image to Docker Hub. This is the same image which we have created in our previous post.
- Create a docker compose file and refer this image at Docker Hub. We will create five replica’s of the Pythonapp image.
- Initialize Docker Swarm mode.
- Deploy the Docker Stack based on the Docker file.
- Check services running for this application.
- Browse the web site and refresh multiple times.
Step 1 : Upload the Pythonapp image to Docker Hub
We will use below e commands to push the Pythonapp image to Docker Hub :
• docker login
• docker tag pythonapp <repo name>/myapps:pythonapp1
• docker push <repo name>/myapps:pythonapp1
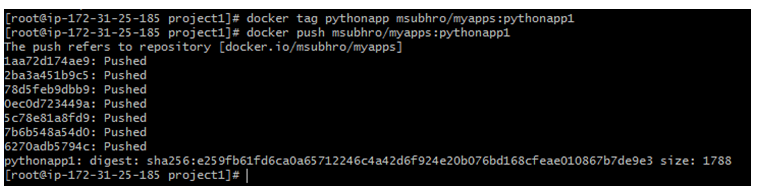
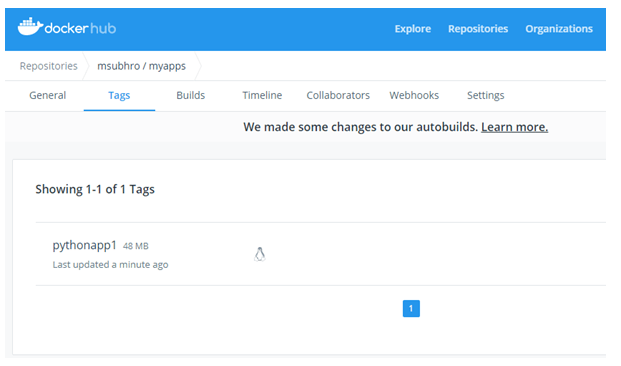
If you login to docker hub, you will be able to see the newly uploaded image.
Step 2: Create the Docker Compose File
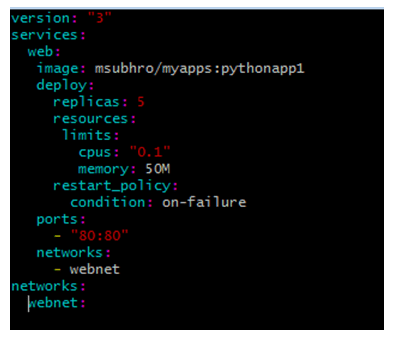
The structure of the docker-compose.yaml file will be as follows. Please be careful about the indention.
version: "3"
services:
 web:
   # replace "pythonapp" with your image name
   image:<repo name>/myapps:pythonapp1
   deploy:
     replicas: 5
     resources:
       limits:
         cpus: "0.1"
         memory: 50M
     restart_policy:
       condition: on-failure
  ports:
    - "80:80"
  networks:
    - webnet
networks:
webnet:
This docker-compose.yml file tells Docker to do the following:
• Pull the existing Pythonapp image from the image registry.
• Run 5 instances of that image as a service called web, limiting each one to use, at most, 10% of a single core of CPU time (this could also be e.g. “1.5” to mean 1 and half core for each), and 50MB of RAM.
• Immediately restart containers if one fails.
• Map port 80 on the host to web’s port 80.
• Instruct web’s containers to share port 80 via a load-balanced network called webnet. (Internally, the containers themselves publish to web’s port 80 at an ephemeral port.)
• Define the webnet network with the default settings (which is a load-balanced overlay network).
Note that here we have mentioned number of replicas as 5, which means 5 containers would be running for this image. Since we have only one host in this case, all these 5 replicas would run within the same host.
For that reason, we have also specified CPU and Memory limits in the above file.
To understand the indention, we are showing a screenshot of the docker-compose file :
Step 3: Initialize Docker Swarm mode
As mentioned above, we need to initialize Swarm mode before we run Docker Stack.
We will run below command to initialize the Swarm mode :
docker swarm init
In general, Docker Swarm is initialized to create a Docker cluster, where at least one node acts as a Swarm Manager (Master Node), and other nodes act as worker nodes. But in this case, since we have only one node, this node is the Swarm Manager as well as the worker node.

Step 4: Deploy the Docker Stack based on the Docker file
Now that our docker compose file is ready and we have initiated Swarm mode, we can run the Docker Stack. For that, we will run below command :
docker stack deploy -c docker-compose.yml pythonapp1

Step 5 : Check services running for this application
We have deployed the application, so the containers should be running now. Since we have specified five replicas, so we should see five containers running for this app.
The command syntax to check all services related to a particular application is :
docker service ps <app name_service name>
If you remember, we have named the service as web in the docker file, and our application name is pythonapp1. So the command would be as follows :
docker service ps pythonapp1 _web

As you can see, there are five containers running.
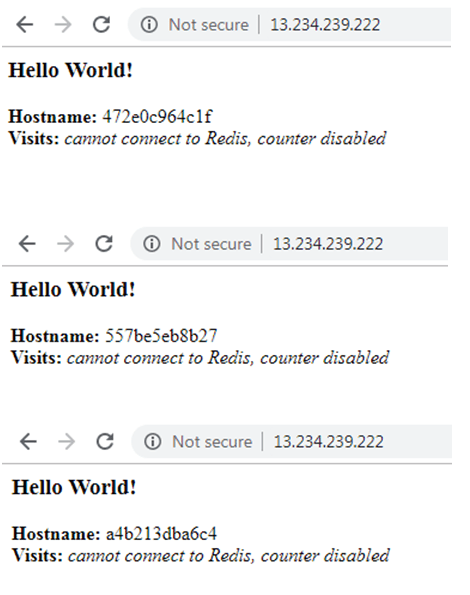
Step 6: Browse the web site and refresh multiple times
Once you refresh the web multiple times, the response will come from different containers, since there are five replica’s running for the same application. Each container will show you a different host name. These host names corresponds to the respective container ID.
You can also validate the container details by running below command :
docker ps -a

Summary
In this post, we have discussed how we can build and deploy and application which consists of multiple containers. We have discussed Docker Compose and Docker Stack, and differences between them. We have seen the architecture of a docker-compose.yml file.
Finally, we have deployed a multi-container application using Docker Stack.

One thought on “Create a Multi Container Docker Application”