Introduction
In this article, we will explore basic operations related to Docker. We will install Docker in an Amazon Linux instance. We will import Docker image and create container from the Docker image. We will also explore Docker Hub.
Docker Installation
We will install Docker in an Amazon EC2 Linux instance. AWS offers two variations of Linux, called Amazon Linux and Amazon Linux 2. We have performed our activity on an Amazon Linux based instance.
Login to the instance and take root privilege.
- sudo su
Now, run below commands one by one, which will install Docker in the system.
- yum update -y (Updates installed packages)
- amazon-linux-extras install docker (for Amazon Linux 2 : Installs the latest version of Docker)
- yum install docker (for Amazon Linux : Installs the latest version of Docker)
- service docker start (starts the Docker service)

So Docker is now installed in this system, and we have started the service.
You can refer this page for Docker installation reference.
Create a Docker Hub Account
Docker Hub is the most popular repository of Docker container images.
Docker Hub offers following features :
- Pull official container images published by Docker.
- Pull community images, published by community members.
- Push your own container images.
- Push container images from Github / Bitbucket to Docker Hub.
- You can trigger certain action upon Docker image push, using Webhooks.
Before you start using Docker Hub, you have to open an account in the Docker Hub portal. which is hub.docker.com. When you want to push / pull an image to / from the Docker hub, you have to login in your Docker Hub account.
You can store your Docker image in local system, in Docker Hub or both. When you are working on your local Docker image, you do not need to sign in to Docker Hub.

Docker : Basic Operations
docker images : This command shows images in local repository, which is within your local system.
As you can see, the local repository is currently empty and there is no image within it.

docker run hello-world : This command will first try to find the hello-world image in the local image repository. If not found locally, it will import image of hello-world container from docker hub, and will run it.
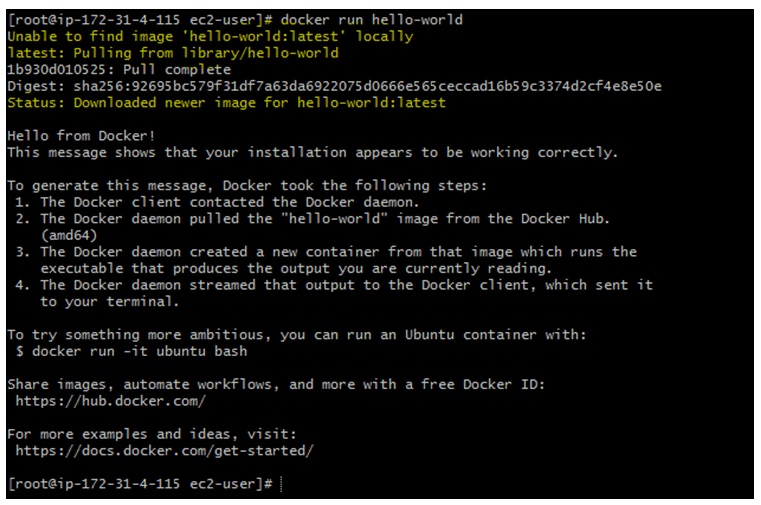
Now, when you execute docker images command again, you will see the hello-world image is present in the local repository.

Now we want to see all running containers in our local system. For this we will use the command docker ps -a

You can see that the hello-world container is running in the local system. This is because when we executed docker run helllo-world command, it downloaded the image from Docker Hub and also created a container from the image.
Import an image and configure it
nginx is a very popular web server image, which runs on port 80 by default.
We will download the nginx image from docker hub, and will run the container in port 90.
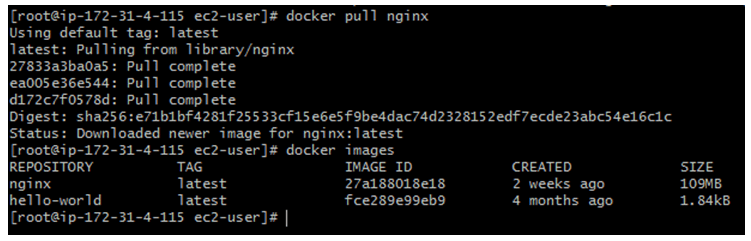
docker pull <imagename> command imports a container image from docker hub, but does not run it. It stores the image in the local system repository.
By default , it downloads the latest version of the container. But we can also specify a version number or a certain release as tag.
docker pull <imagename> : <tag>
Ex: docker pull ubuntu:14.04, will download ubuntu 14.04 container image.
For more details on docker pull, please visit this link.
In our case, we will run docker pull nginx command to download the ngnix image.This command will pull the image from Docker Hub to local repository, but will not run it.
Now that the image has been downloaded in local repository, it’s time to publish the container. But as mentioned before, we want the container to run on port 90, not on default port 80.
docker run -p 90:80 nginx : Here, 90 is the host port and 80 is the original port, in which the application is running within container.
-p : Publish a container’s port(s) to the host. So it helps mapping a particular port between the container and the host.
In other words, the container port 80 has been mapped with host port 90. So outside world will access this application in port 90 (host port), but inside the application is running in port 80 within container.
Note: Once you run this command, cursor will keep on blinking, as the container is running in the system.
If you press ctrl+c, you will get back the prompt. The container will keep on running until you stop it or stop the system.

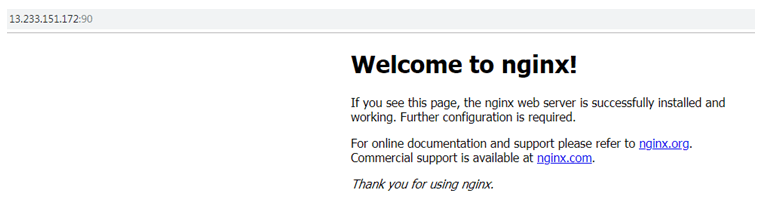
Now if you open the portal using server’s public IP : Port number, you should see the site.
Note: Make sure inbound port 90 is open in AWS Security Group, which is attached with the Docker node.
Detached Mode and Foreground Mode
You can run a Docker container in two modes, Detached mode or Foreground mode.
In detached mode, the container runs in the background. You can specify detached mode with the -d option.
In the Foreground mode, docker run attaches the console with the container for standard input, output and error.
It has two common options :
-t : Allocates a pseudo terminal (TTY).
-i : i stands for interactive process. Keeps standard input output open.
Normally, these two options are used together as -it.
For more information on Docker run options, please refer this link.
Now lets consider an example. Import the ubuntu image from docker hub.
docker pull ubuntu

To run the container execute this command :
docker run -it ubuntu sh
This should show the # prompt, which is the prompt of the docker ubuntu container.

To exit the docker ubuntu and return to the base system, use Exit command.

Stop a running container
There are two commands available to stop a running container.
docker stop <container_name> : This command gracefully stops a running container. This is the command which should be executed to stop a running container.
When this command is executed, two signals are passed. The first signal is SIGTERM, which send a request to terminate the specified container and offers some grace period. This grace period is offered so that the container gets sufficient time for graceful shut down. Once the grace period is achieved, it sends SIGKILL signal to kill the container, if it is still running.
docker kill <container_name> : This command kills a running container. When this command is executed. the default signal that is passed to the container is SIGKILL. However, we can pass custom signal instead of SIGKILL by using –signal option.
As you can see, docker kill (with default signal) does not offer any time to shut down the container gracefully. It is therefore recommended to use docker stop command wherever possible.
Delete images from local system
To delete a specific docker image, use this command :
docker rmi image <image name> / <image id>
The command docker images purge removes all dangling images from the repository. Dangling images are those images which are not associated with any tagged image. Dangling images do not serve any real purpose, but only consumes disk space.
Before deletion, if you want to see the list of dangling images, please use this command :
docker images -f dangling=true
To forcefully delete all images from your local repository, execute this command :
docker rmi $(docker images -q) -f
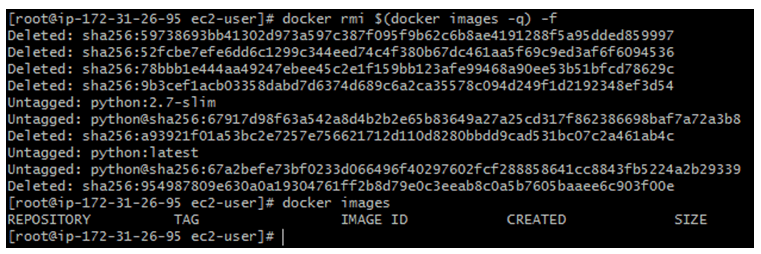
As you can see, when we run docker images now, we do not see any local image.
To remove all existing containers (not images) from the local system, please execute below command :
docker rm $(docker ps -aq)
Summary
In this post, we have installed Docker and explored some basic commands related to Container and Image management.
For a complete list of commands related to Docker container, please refer this link.
For a complete list of commands related to Docker Image, please refer this link.
