Introduction
Almost all version control systems offer branching, and it is one of the most powerful features they provide.
In this article, we’ll explore the basics of Git branching and how to work with local branches — particularly useful when using an IDE like VS Code.
Overview of Branching
When you create a Git repository, the default branch is often called main (it was previously called master in older Git versions). If you haven’t created any other branches, you’re working directly in this default branch.
Working directly in the main branch can be risky. If you commit a buggy piece of code, it affects your production-ready or stable copy.
To prevent this, we create separate branches to work on features or bug fixes. Once the work is complete and verified, we merge it back into the main branch.
If a bug is found in the feature branch, we fix it there — or discard the branch entirely. This keeps the main branch clean and stable.
You can create any number of branches, but avoid unnecessary complexity. Always give your branches meaningful names so you can remember their purpose later.
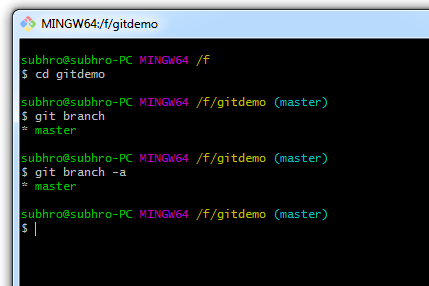
Check Branch Status
Use git branch to display all local branches. If you run git branch -a, you’ll see both local and remote branches.
The asterisk (*) indicates your current active branch.
In our case, we currently have only the default main branch, and no remote branches configured.
Create New Branch
Use git branch <branch name> to create a new branch.
Note: Creating a new branch doesn’t switch you to it — you’re still in the current branch (most likely main).
Always pay attention to which branch you’re committing to. The branch name is usually visible in your command prompt.
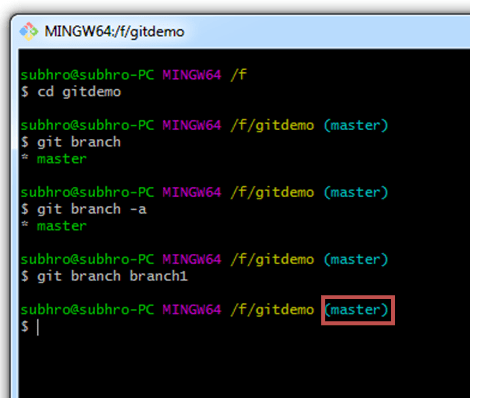
After creating the branch, run git branch again — you’ll now see both branches listed, with the asterisk indicating the current one.

Switch Between Branches
To switch to a different branch, run:
git checkout <target branch name>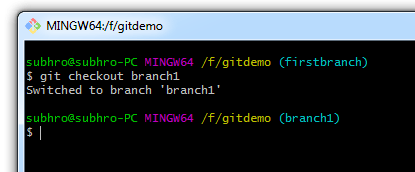
You can also create and switch to a branch in one go:
git checkout -b <new branch name>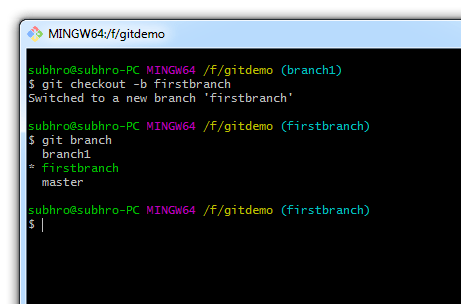
Make sure your working directory is clean before switching branches. Git will stop you from switching if you have unstaged changes.
Create New Worktree
Normally, all Git branches share the same folder. This can get messy if you want to work on two branches simultaneously. That’s where git worktree helps — it allows you to check out multiple branches into different folders.
To create a new worktree for a branch:
git worktree add <directory path> <branch name>
This creates a lightweight working directory linked to your main repo, storing the content of the specified branch in a separate folder.
git worktree list shows all active worktrees. To remove a worktree:
git worktree remove <worktree path>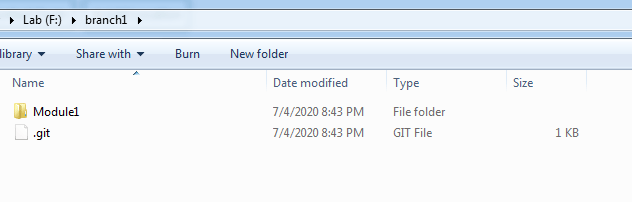
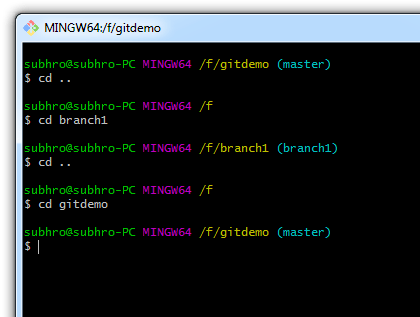
After using worktrees, you can’t switch branches using git checkout alone — instead, just move to the corresponding folder to work on the desired branch.
Work on the New Branch
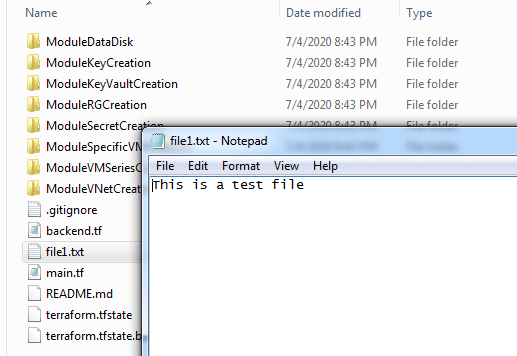
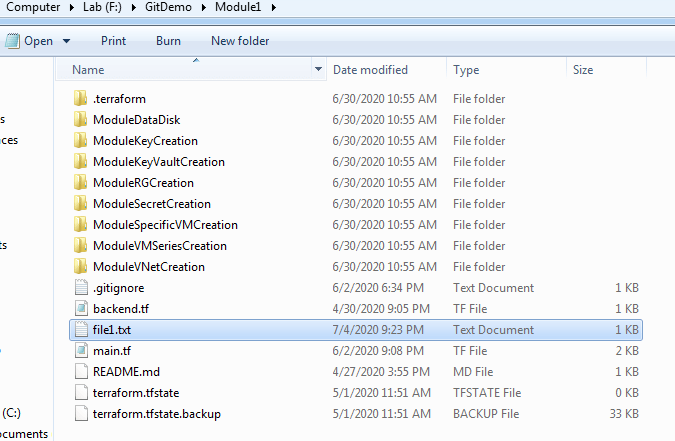
Create a new file named file1.txt inside the folder linked to branch1.
Now commit the file:
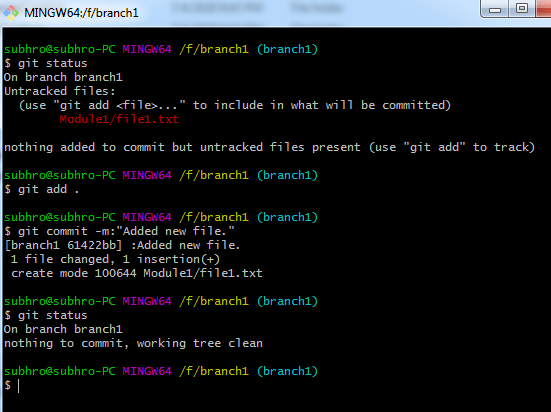
Once committed, you can test the changes and decide if they’re ready to be merged into main.

To merge from branch1 into main, switch to the main branch and run:
git merge branch1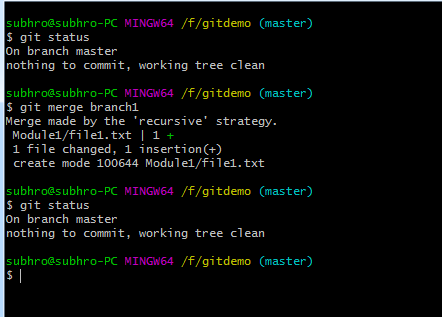
The file from branch1 will now be present in your main folder too.
Deleting a Branch
To delete a branch, first switch to another branch (e.g., main), then run:
git branch -d <branch name>If the branch is associated with a worktree, remove the worktree first:
git worktree remove <worktree path>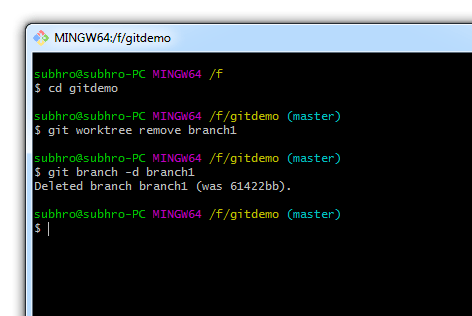
Summary
Let’s summarize the commands we used:
-
-
- git branch: Display local branches
- git branch -a: Display all branches (local + remote)
- git branch <branch name>: Create a new branch
- git branch -d <branch name>: Delete a branch
- git checkout -b <branch name>: Create and switch to a new branch
- git checkout <branch name>: Switch to an existing branch
- git switch <branch name>: (Newer alternative) Switch to an existing branch
- git worktree add <path> <branch name>: Create a new worktree
- git worktree list: List all worktrees
- git worktree remove <path>: Remove a worktree
- git merge <branch name>: Merge branch into the current branch
-
Tip: Always use git status to check your working directory before switching or merging branches.

One thought on “Working on Local Git Branches”