Introduction
Terraform State file is one of the most vital components of Terraform. As the name suggests, the state file keeps track on the current state of the inventory.
In this article, we will discuss how to configure a remote state file in Terraform.
The remote state file is also referred as remote backend, as remote state is a feature of Terraform backends.
When you run terraform plan, following steps happen in the back end :
• Terraform checks the state file and makes a list of the current inventory, with current state.
• It then reads your code which is there in the working directory, and creates a list of the desired state.
• Terraform then compares between the existing state and the to-be state, and lists down what all changes need to be done to achieve the desired state. This can include addition, deletion or modification of Azure resources.
• When you run terraform apply, those changes are performed to achieve desired result.
When you are the only developer, who are working alone on your code, you can keep the state file in your local system.
However, when multiple developers work collaboratively on the same Terraform environment, then keeping state file in a local system will not work. Because any change in the infrastructure will only be updated in your local state file, but other developers will still carry the older version of state file in their local systems.
In that case, you have to store the state file in a remote location which can be accessible to all.
Also, if you decide to deploy your Terraform code through CI/CD pipeline, you have to store our state file in a remote location which is accessible to the pipeline. This is because pipeline uses agents to run these codes, which do not have any permanent storage location.
In this article, we will configure remote state file for Terraform. We will create an Azure Storage Account and store the state file there. Once done, all developers and pipeline can access this remote state file.
Step 1: Create Storage Account
You need a Storage Account and a Blob Storage Container. This storage account is typically called back end storage for Terraform state file.
you can select any name for this storage account and container.
You do not need to create any state file now, you will configure it later. For now just create empty blob container.
Now, please note down below values, which you are going to use in the next step.
• storage_account_name : The name of the Azure Storage account.
• container_name : The name of the blob container.
• key : The name of the state store file to be created.
• access_key : The storage access key.
One interesting point here is, the key object does not contain any key but contains Terraform state file name. The file name can be anything, but file extension should be .tfstate.
Your configuration file will not contain access_key value , for security reason. This is an improvement made over previous Terraform versions.
Step 2: Install Azure CLI
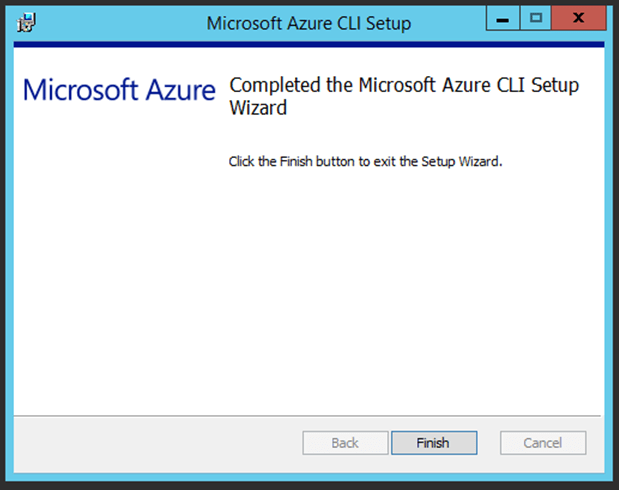
You have to install Azure CLI in your local system.
Azure CLI will be required during initial configuration, as well as post configuration.
Once the remote state file is configured, you need to have Azure CLI present in your system in order to securely connect to the remote state file. Without this, you will receive error during terraform init or terraform plan.
Azure CLI is a free tool, which you can download and install in your local system.
Azure CLI is OS specific, so if you will execute Terraform code from a Windows system, download Azure CLI for Windows.
In this case, we will run the Windows version of Azure CLI, as our base system is Windows.

Step 3: Login to Azure CLI
Now that Azure CLI is installed in your local system, you can use it from the command prompt.
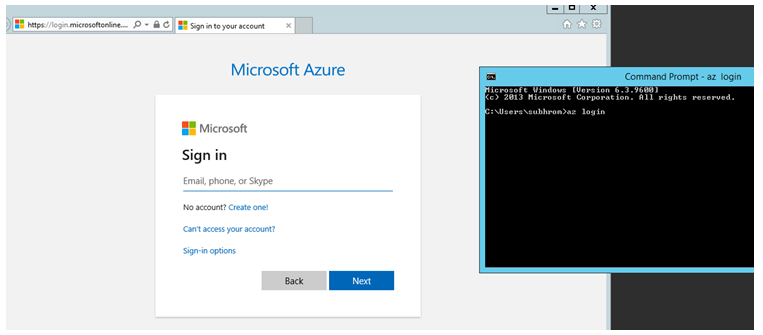
Open command prompt and type az login. you will be prompted for Azure credential.
You might get below error when you run az login for the first time.
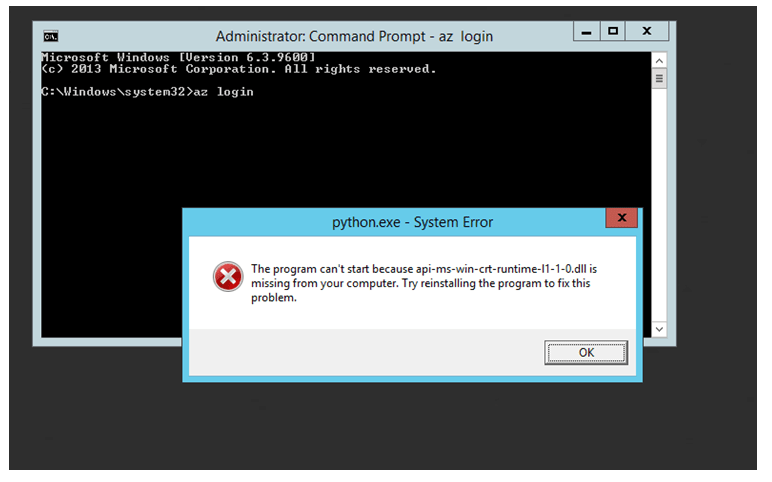
If you get the above error, download Update for Universal C Runtime in Windows from this link. Make sure that download the appropriate version which is compatible with your Operating System.
You will get a confirmation like the below screen, once azure login is successful.
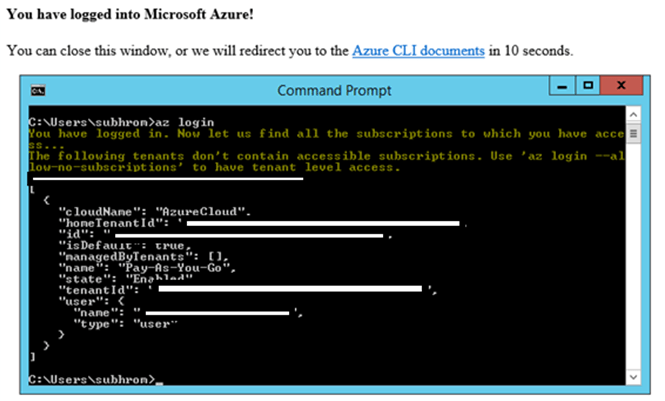
Once authentication is successful, you can close the browser, but do not close the command prompt.
Step 4: Export Storage Access Key
To access and update the remote state file which is stored in the storage account container, Terraform needs to authenticate to the Storage Account. In this case, you will use Storage Account Key for authentication.
However, Storage Account Key is sensitive and you should never hard code it in your configuration file.
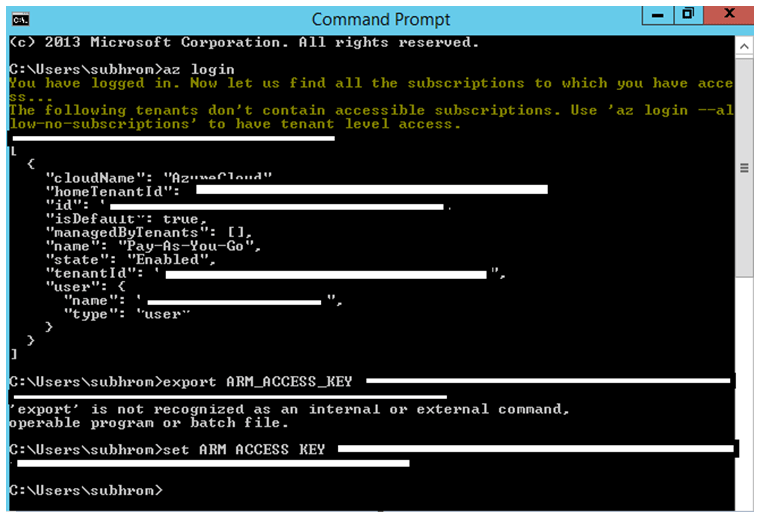
In this step, you will create an environment variable named ARM_ACCESS_KEY, and will export the Storage Access Key to the environment variable. Once you do that, you do not need to mention the access key in the configuration file.
Run the following command in Azure CLI command prompt. Make sure you are already logged in to Azure CLI as mentioned in the previous step.
set ARM_ACCESS_KEY=<storage access key>
Note: For Bash shell in Linux, use export instead of ‘set’. For Windows, use set.
Step 5: Create Configuration File
Now, you have to create the configuration file for remote state file.
The configuration file will be as follows :
terraform {
backend “azurerm” {
resource_group_name = “RGofStorageAccount”
storage_account_name = “StorageAccountName”
container_name = “BlobContainerName”
key = “filename.tfstate” (State file name)
}
}
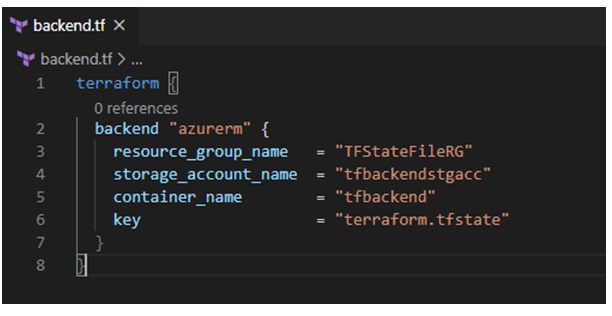
Store the backend.tf file directly under the working directory where you have main.tf file.
Note: If you want to use multiple state files under the same storage account and under same container, you can copy this backend.tf file in other Terraform configuration. All you have to do is, to change the state file name in the Key section.
Step 6: Run Terraform Init
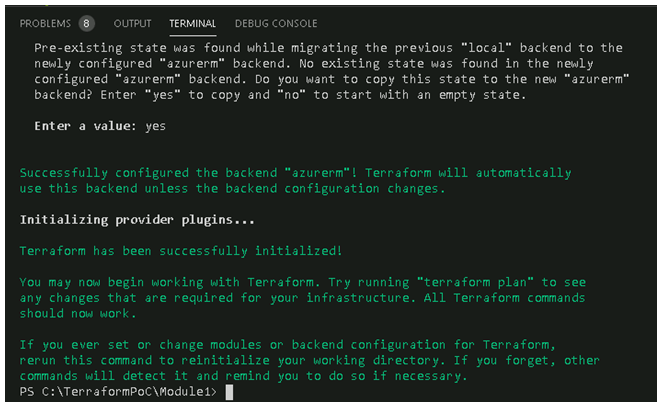
Now, run terraform init. During initialization, it will load the configuration file and will read the remote state file configuration.
Terraform will then ask you, whether to create an empty remote file, or to copy existing state file to the remote state file. Select the option carefully, based on your requirement.
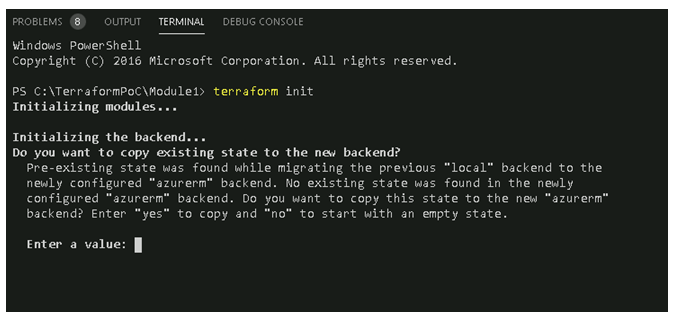
If you want to retain current state, select Yes and it will create a remote state file and copy the local state file contains to the remote state file.
If you select no, then it will create an empty remote state file, and will not copy contains of current state file.
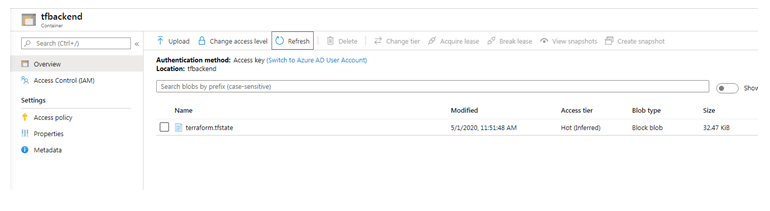
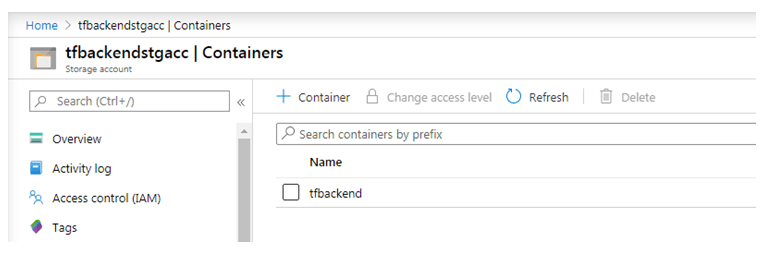
As you can see, the remote state file has been created in the blob container. From now onwards, Terraform will update this remote state file instead of the local state file.
If you want to ensure that Terraform is using the remote state file and not the local state file, keep checking the remote state file size and last update time.
Configuration on additional systems
If multiple developers will use the same remote state file, you have to repeat above steps in every system.
One important point to remember is, all systems must use same version of Terraform in order to share the same state file. If a state file is updated by a higher version of Terraform (from one system), the same state file cannot be updated by a lower version of Terraform (from the other system).
Also, if you are updating the same state file using DevOps pipeline, make sure that the pipeline uses same version of Terraform.
Summary
In this post, we have discussed how to configure Remote State File (remote backend) for Terraform. Here, we have done the configuration on a Windows system, but almost similar steps will work for Linux as well.
Using Remote State file is a recommended approach, specially when multiple users are using and updating the same state file. It is also required when you deploy Terraform code using DevOps pipeline, which we have covered in another article.
